How to Create a Mac Menu Bar App With NSPopover
In this tutorial I'm going to walk you through creating a menu bar app for macOS, which displays a custom view inside an NSPopover.
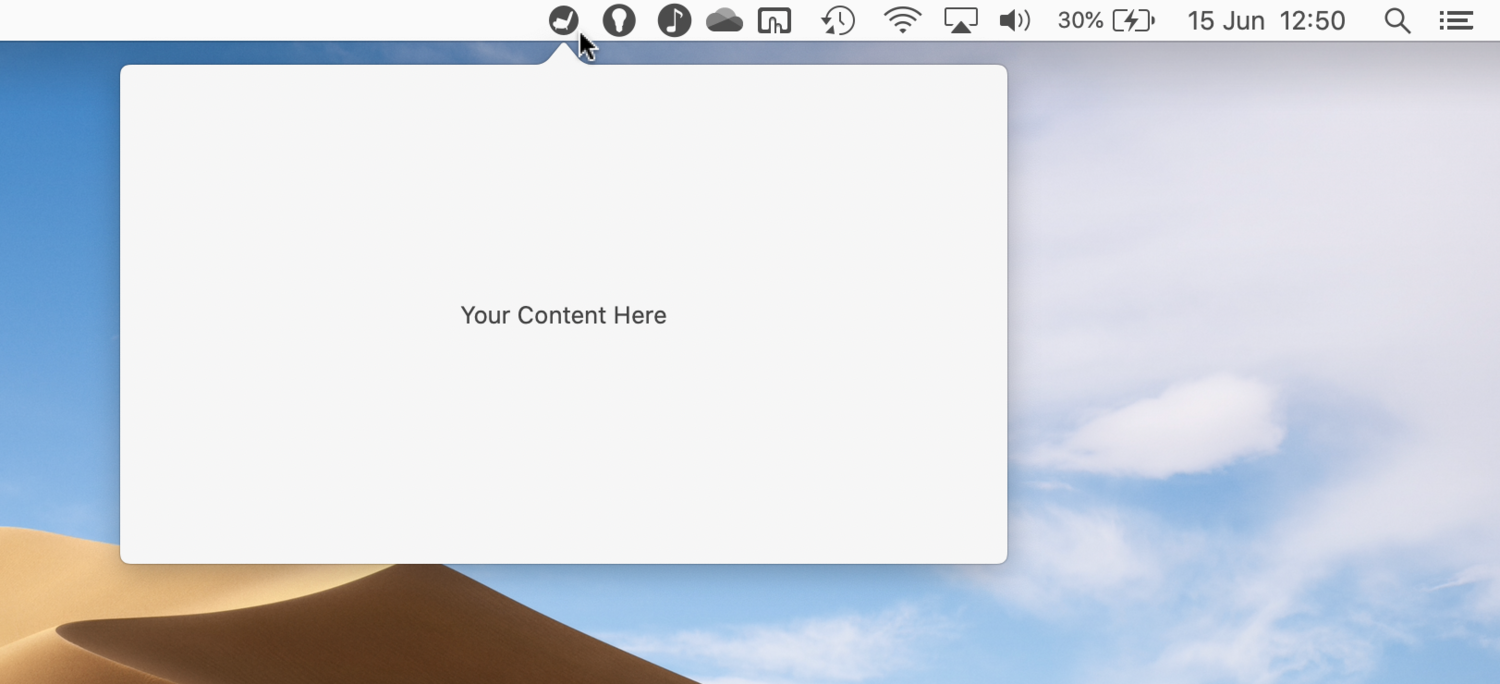
The goal of this tutorial
Basic Set Up
In Xcode, go to File > New > Project… then select App from the macOS tab and click Next. Fill in the project details as you like, click Next again, choose where to save the project and click Create.
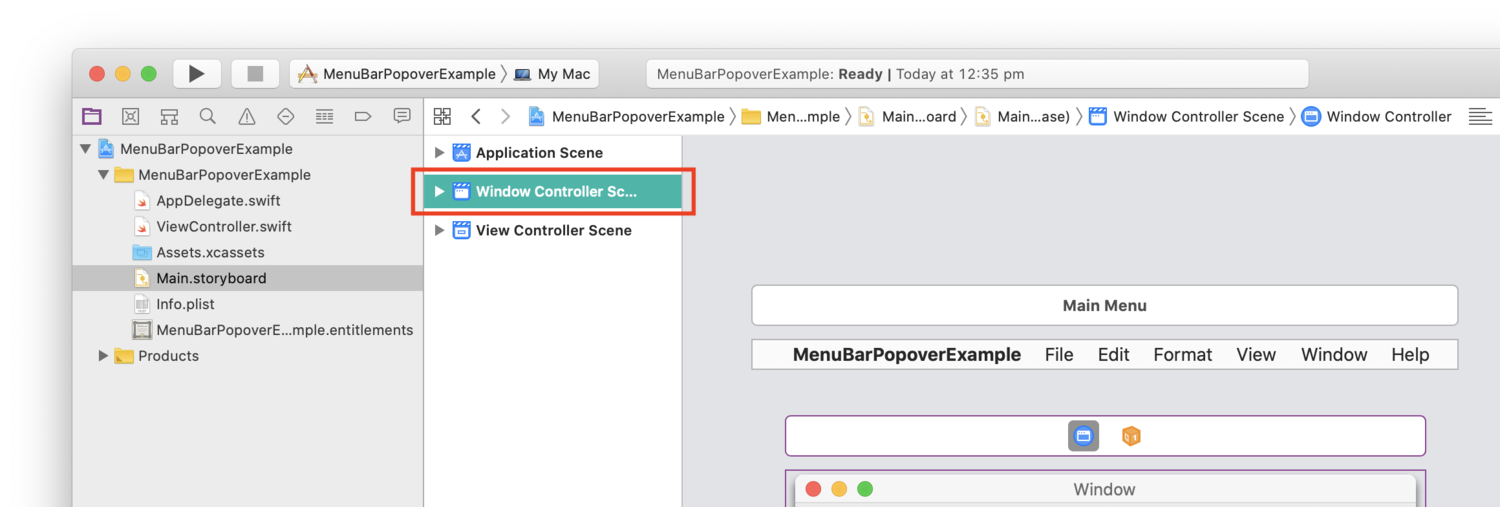
To be a proper menu bar app, the interface should only be accessible from the menu bar. To archive this we need to hide the dock icon and main window. First, simply open the Main.Storyboard file of the project then select and delete the Window Controller Scene (not the View Controller Scene). This will prevent the main window from displaying.
To disable the dock icon, open the Info.plist file of the project and add Application is agent (UIElement) as a new key and set its value to YES.

Before we move on to the fun stuff, let's just take care of one more thing. In order to display an NSPopover, we will need a reference to an NSViewController, so let's quickly set up a way to get one.
Open the Main.Storyboard again, select the View Controller Scene and click the small triangular disclosure button on the left to reveal its View Controller object. Select that, and then in the Identity Inspector (press Option + Command + 4 to show the inspector) make sure the Storyboard ID property is set to "ViewController".
Now jump over to the ViewController.swift file and add the following inside the ViewController class.
static func newInsatnce() -> ViewController {
    let storyboard = NSStoryboard(name: NSStoryboard.Name("Main"), bundle: nil)
    let identifier = NSStoryboard.SceneIdentifier("ViewController")

    guard let viewcontroller = storyboard.instantiateController(withIdentifier: identifier) as? ViewController else {
        fatalError("Unable to instantiate ViewController in Main.storyboard")
    }
    return viewcontroller
}
I won't explain this in great detail as we have bigger fish to fry, suffice to say it's a convenience method we will use later to create an instance of the ViewController class from our main storyboard. Once finished, this class will be the main interface for your app and can be customised as needed.
Displaying the Popover
Enough of the tedious stuff, let's get a popover going already!
Go to the AppDelegate.swift file and copy the following inside and at the top of the AppDelegate class.
let statusItem = NSStatusBar.system.statusItem(withLength:NSStatusItem.squareLength)
This code asks the system to create and return a new, empty status item object of a specified width.
Menu items that occupy the right side of the macOS status bar are called status items, those on the left - used to perform actions in the currently focused application - are just referred to as menu items (NSMenuItem and NSStatusItem respectively).
For the length parameter we pass in NSStatusItem.squareLength to make the item as wide as it is heigh (a.k.a square).
Now that we have a reference to the newly created status bar item, we can customise its appearance and listen for click events.
Add the following inside the applicationDidFinishLaunching function, still in AppDelegate.swift.
if let button = self.statusItem.button {
    button.image = NSImage(named: NSImage.Name("ExampleMenuBarIcon"))
    button.action = #selector(AppDelegate.togglePopover(_:))
}
Here we are getting a reference to the NSStatusBarButton object of the status item and setting its image to a custom one.
Make sure you have an image set inside the Assets.xcassets folder with a @2x image of size 32x32px, and use its name in place of "ExampleMenuBarIcon".
We then set the button's action to trigger the togglePopover function, that we will write next, to fire whenever the status item is clicked.
Add the following function inside and at the bottom of the AppDelegate class.
@objc func togglePopover(_ sender: NSStatusItem) {
}
Now that we are capturing click events, it's finially time to display the promised popover. Add an initialised NSPopover variable under the status item declaration, still inside AppDelegate.swift, like so:
let popover = NSPopover()
And then add the following two lines at the end of the applicationDidFinishLaunching function:
self.popover.contentViewController = ViewController.newInsatnce()
self.popover.animates = false
The first line sets the content of the popover to be a new instance of the ViewController class, using the convenience method we set up earlier. The second just prevents the popover from animating when opened or closed, which I find distracting.
Now add the following function at the end of the on AppDelegate class:
func showPopover(sender: Any?) {
    if let button = self.statusItem.button {
        self.popover.show(relativeTo: button.bounds, of: button, preferredEdge: NSRectEdge.minY)
    }
}

func closePopover(sender: Any?)  {
    self.popover.performClose(sender)
}
As the names suggest, these will be used to actually show and hide the popover.
Now add the following inside the previously written and empty togglePopover function.
if self.popover.isShown {
    closePopover(sender: sender)
}
else {
    showPopover(sender: sender)
}
This code will trigger the appropriate action - either open or close - depending on the current status of the popover, creating the toggling behaviour.
That's it! Now try to build and run. If everything was set up correctly, you should see a status icon with your custom icon, that when clicked shows and hides a view inside a popover.
Demo code is available here, which also includes a simple EventMonitor class that ensures the popover is dismissed when the user clicks outside its bounds. As well as some commented out code that could be used to capture right mouse click events, which you might want use to display a separate view upon detection of that action.